Call an action
In the example presented here, the three options presented to the customer might require the bot to do more than just provide prerecorded information. As mentioned earlier in this chapter, Power Virtual Agents can also perform actions by working together with Power Automate. It is actually Power Automate flows that perform actions, but a Power Virtual Agents bot can pass information to a flow and receive information back using variables.
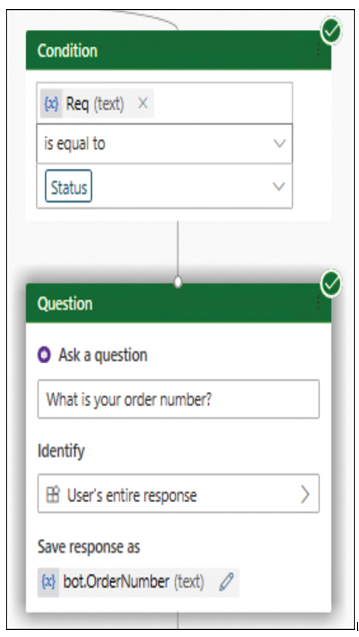
So, for example, if a customer requests the status of an order, the bot can request an order number from the customer and save it to a variable, as shown in Figure 6-16.

FIGURE 6-16 Assigning bot user input to a variable
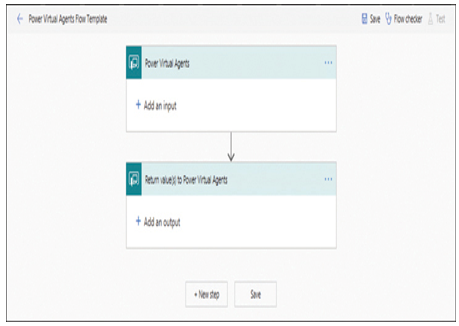
When the developer clicks the plus sign to add a node and selects Call an action, the option Create a flow appears. This option opens the Power Automate portal in a separate window and loads the Power Virtual Agents Flow Template, as shown in Figure 6-17.

FIGURE 6-17 Power Virtual Agents Flow Template in Power Automate
The developer can then build a flow in Power Automate, using the variable created by the bot, which appears in the Dynamic content window, as shown in Figure 6-18, to query a database and retrieve the order status. The flow can then pass the order status it has discovered back to the bot using a variable in the same way, and the bot can furnish it to the customer.

FIGURE 6-18 Adding a Power Virtual Agents variable to a Power Automate flow
Test a chatbot
In the lower-left corner of the Power Virtual Agents portal is a Test your bot button, which opens a test pane, as shown in Figure 6-19. This pane allows the developer to interact with the bot as a customer while tracking the progress of the conversation through the nodes in the workspace.

FIGURE 6-19 Testing a bot
Acting as a customer, the developer initiates the conversation with one of the topic’s trigger phrases. As the test conversation proceeds, each node that is processed appears with a green title bar and a circled check mark in the top-right corner. If problems occur, the developer can make changes in the workspace and click the Reset button at the top of the pane to begin the conversation again.

